This topic contains 204 reacties, has 55 deelnemers, and was last updated by Piergiorgio Pagani 6 years, 3 months geleden.
-
Gebruiker
-
24 mei 2013 om 19:00 #282663
citta1234, I think that I can finish the engine on comming weekend.
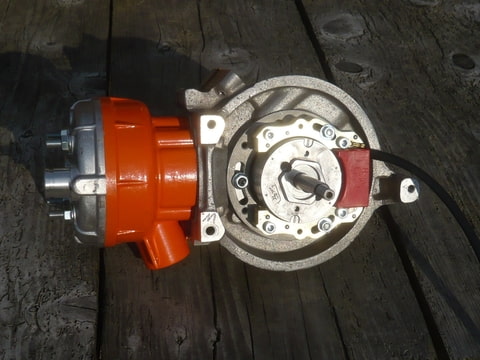
But like misterd11 said, for test drive there need to be some more work done on the frame. This is for sure not a plug and play project. 😀But Turbociao’s idea for using studs was perfect. Ignition can be fixed now easily with nuts :bier
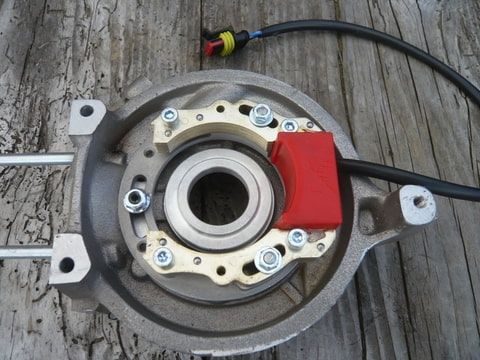
The M6 stud what came through into the port is grinded to length now.
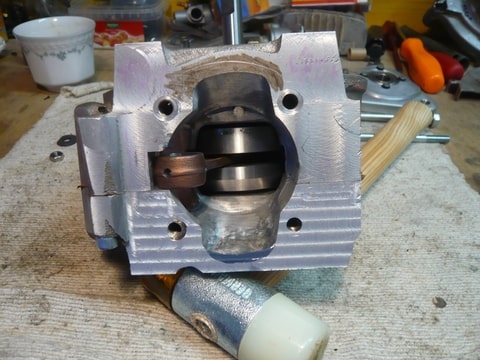
and krukas fixed with bearings into first carter half
 25 mei 2013 om 19:30 #282664
Nice to see that the idea with the studs works,it looks solid.
25 mei 2013 om 20:21 #282665on the last pic, is that bearing mounted correctly? look’s like it needs to be deeper on the crankshaft or am i wrong?
nice work on the rotor, i wish there were kits for original engines.
25 mei 2013 om 20:29 #282666yes, it is solid

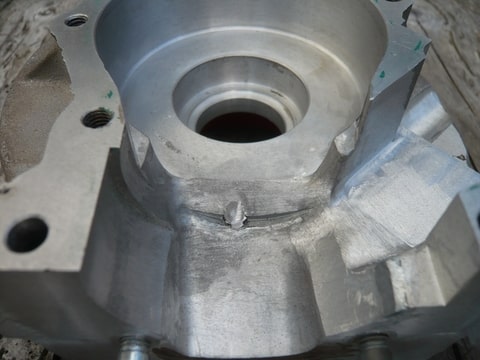
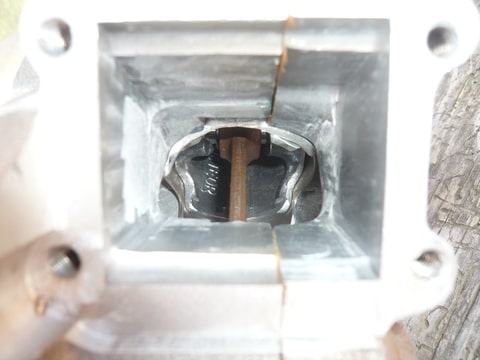
Today I assembled the two carter halfs. That was not easy as the carters have no center ring like ori, Malo or Polini carters what brings both carter half into right middle position to each other.
So I had to disassemble the carter halfs three times till I had free turning without blocking of the krukas. :'(
But now, it moooves easily 😀
Also there is still some potential on the cylinder ports. Will enlarge them tomorrow.
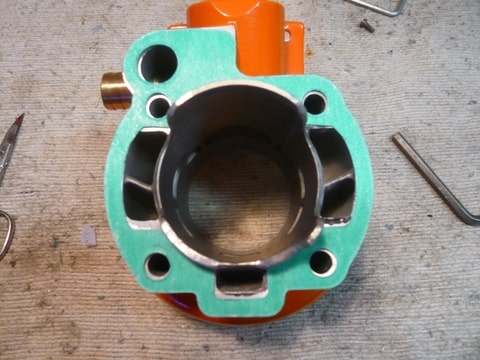
Any recommendations about Squish for the 50mm Parmakit?
EDIt to Lastpak:
The bearing pockets in the carters were so deep that I had to put a 0,5mm washer below each bearing to get the right outer dimension fitted to the bearing pockets depth after the carters are closed.
Otherwise I have the fear that the bearings have a gap to the bearing pockets ground and can move during engine running.
I think you can fix that ignition to a standard engine as there comes an adapter plate with the ignition.
25 mei 2013 om 20:58 #282667damn, you sure work fast!
well, typical sprocatti quality i guess. no center ring and a little problem with the bearing pockets, and let’s not forget the work you already did on the engine cases. but you probaly knew this beforehand, nice to see you keep going! i can’t wait to see a video of this beast.
I think you can fix that ignition to a standard engine as there comes an adapter plate with the ignition.
for original engine cases, electric ignition or contact points ignition? wouldn’t there be a problem for the rotor angle?
i thought that was not plug and play. if you don’t want this in your perso we could continue by pm.26 mei 2013 om 11:12 #282668If the crankcase halves line up now, I would drill two or three holes where there is enough material and put in some bushings (what we call a ‘spanbus’ here).
So drill 3mm to a specific depth and then drill the hole in the small half 3,1 or 3,2mm. That will make future (dis)assembly much easier.
And like Lastpak said, you work fast! It’s a beautiful engine and like many, I can’t wait to see it run. Keep it up.
26 mei 2013 om 16:28 #282670Nice work man! It take sa little creativity and it looks like you are having fun with it
Also looking forward to the next progression.<3 Thunderstone
Check mijn perso!27 mei 2013 om 17:58 #279398Javad, yes if you buy a Sprocatti you need a big portion of creativity. And with the great support from this forum here it make also fun. 😀
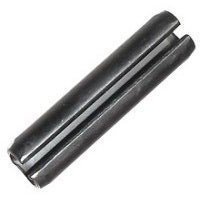
FonS, tädä, and here are the 4mm spanbus (Spannstifte :lol). Thanks for helping me on that horse, it is real long time ago when I fixed parts with spanbushes. But now my grey brain cells are working again.
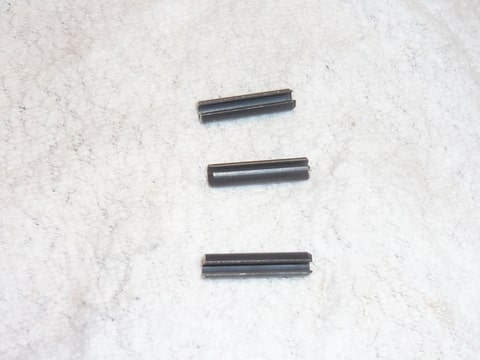
Three holes drilled
and bushes in, fixed for ever in position. 😉
 27 mei 2013 om 18:12 #282672
=)=)=) Nice Piet!
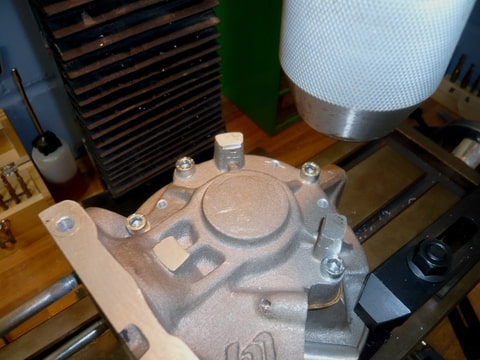
27 mei 2013 om 19:09 #282673You have the nice triangle cnc bearing holder to, i see 😉
30 mei 2013 om 13:49 #282476Marco, yes in advance 😀
I think I will need all stiffness what I can get. This cnc bearing holder looks stronger than the original one.
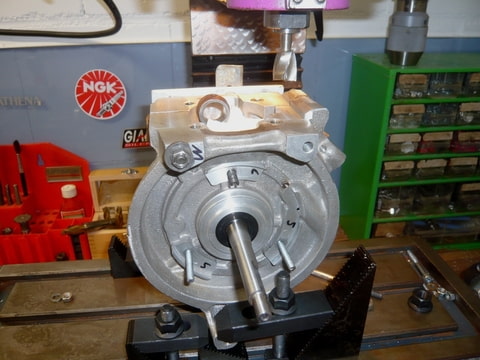
Now after the carter is fixed in right position that the kruk can turn easily without scratching the carter inner diameter the sealing surface for the cylinder gasket was not plain anymore.
So schwups (after 2 hours adjusting) mounted it on my milling machine and equalized the sealing surface with milling 0,2mm off on one carter half. 😉
 30 mei 2013 om 14:18 #278032
Sure looks good piet, keep up the good work. Cant wait to hear this engine run.
30 mei 2013 om 15:09 #279727Nice too see you need all the extra work on this sprocatti engine. Was it not better to build your own “Piet30″engine from scratch? 😀 Sprocatti is sort of famous for all the extra work you need to let the motor running.
How many hours work do you have on this engine now? Allthough your work looks very good and you seem to like it.
4 juni 2013 om 17:45 #282678Martino, 😀 yes, I should have milled it from a Alu block by myself, maybe next time.
I didn’t count the hours till now, let’s say it is a hobby. Otherwise I would sit in front of the TV or in a corner turning thumbs.
Engine ready now :@

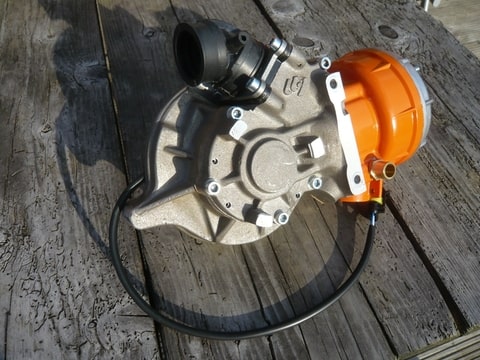
Now waiting for the frame 😉
4 juni 2013 om 18:04 #282680Wow it even looks good without a moped. 🙂
Is this engine for the green frame or perhaps for your new blue one?
-
Gebruiker
Je moet ingelogd zijn om een reactie op dit onderwerp te kunnen geven.